Alright, here it goes!
I tried to take pictures to go through all of the steps. It was easy to do but very tedious so if you plan on going this route, have patience.
My friend Jessica helped me with all of this so an extra set of hands makes a world of difference. Even with her help, we worked on 55 invitations for several hours.
I will review previous DIY posts so that all you new readers can catch up!
I got my FREE templates from http://www.weddingchicks.com/freebies/
Two invitations fit on one 8 1/2 x 11 sheet of vellum paper-- which I was able to print the templates at Office Depot for $.59 per sheet (per 2 invitations). If you want to print in black and white, it is only $.10 per sheet.
To start out, Jessica and I cleaned off the table and made sure we had plenty of space. You will need your printed sheets, cardstock (if you want a thicker/harder background), ribbon, a hole puncher, scissors and a paper cutter (a ruler and X-acto knife will work fine but will take longer).
After you have all of your supplies, start cutting. Make sure you practice with a spare sheet first so that you can measure where you need to cut. You wouldn't want to mess up and have to run back to the store for more supplies. Plus, you want to make sure your text sheet fits on your background sheet.
After you have cut the text sheet out, line it up to make sure it is the right size for the bottom sheet.
Once your sheets are lined up the way you want them, grab your hole punch!
Figure out where you want your bow and the distance between the two holes will determine the thickness.
I punched holes about an inch apart in the top middle of the sheet, right above the initial.
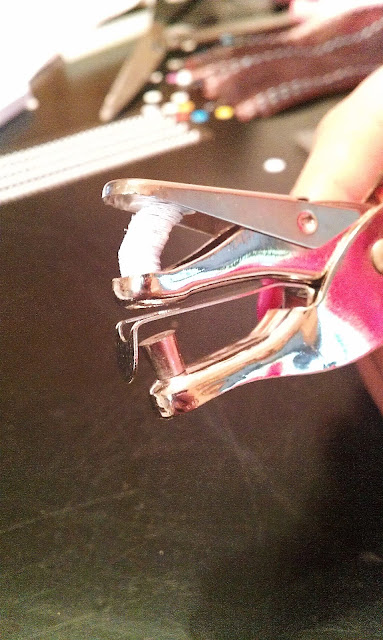
Be sure to empty your hole punch. It stacks up fast and creates complications like this! You wouldn't want it to get jammed or stuck on your invitations.
Now it is time to tie the bow! I have included a youtube video link so that you can have video instructions (to make that a bit easier on you). If you don't prefer to watch the video, I will provide written instructions as well.
http://www.youtube.com/watch?v=Q7klQWxH7mg
Pull the ribbon through one hole. The other side of the ribbon will go through the other hole so that the ribbon is across the front of the invitation (both ends will be poking out of the back).
After the above steps are complete. Grab one end of the ribbon and pull it through the opposite side and towards the front then do the same thing with the other end.
Next, we added a small touch, pearl stickers!
Then we finished! I am really happy with how they turned out!!
Hope this helped everyone else.


Thank you for sharing this tips.. I've learned a lot from this post.
ReplyDeleteYou're so welcome! Glad i could help and thank you for the comment :)
ReplyDeleteNice job! Where did you get your little pearl stickers?
ReplyDeleteI actually got them at Hobby Lobby :) You can go online and get a 40% off coupon any time so that helps a lot too!
ReplyDeleteDid you order the Vellum paper before you printed them or ask Office Max to print on that paper?
ReplyDeleteGreat question Tina! I actually purchased the vellum from Hobby Lobby then took it to Office Max. I asked them to print it using my paper and they were more than happy to. Good luck!
ReplyDeleteHow did you get two invitations on one page?
ReplyDeleteI saved the template as a jpeg and inserted them into Word. From there, I used the sizer tool and sized them down to fit 2 across. I then printed 'landscape' instead of letter.
DeleteWhere did you get the template to print on the vellum paper? I'm making my own invitations as well and am baffled on how/where to do it... Please help! Anyone! Lol
ReplyDeleteHello! I actually got them from http://www.weddingchicks.com/freebies/
DeleteI am sure if you google search for 'free wedding invitation templates', you'll have plenty to choose from! If you're familiar with Photoshop, you can also try to make some of your own designs.